
Why Are New Wiper Blades Still Streaking? Causes and Fixes
Oct 28, 2026
Installing new wiper blades should produce a clear, consistent wipe immediately. When new blades leave lines, cloudy films or large wet areas on the windshield, many drivers assume that the product is defective. Sometimes it is, but a new blade can also perform poorly because of windshield contamination, incorrect installation, unsuitable fitment or a problem with the wiper arm.
I am Jacky Huang, CEO of Xiamen TOPEX Auto Parts Co., Ltd. From our experience with wiper blade manufacturing, fitment and performance testing, the most effective troubleshooting method is to read the streak pattern and eliminate possible causes in a logical order. Replacing the blades repeatedly will not solve contamination, incorrect arm pressure or a damaged windshield surface.
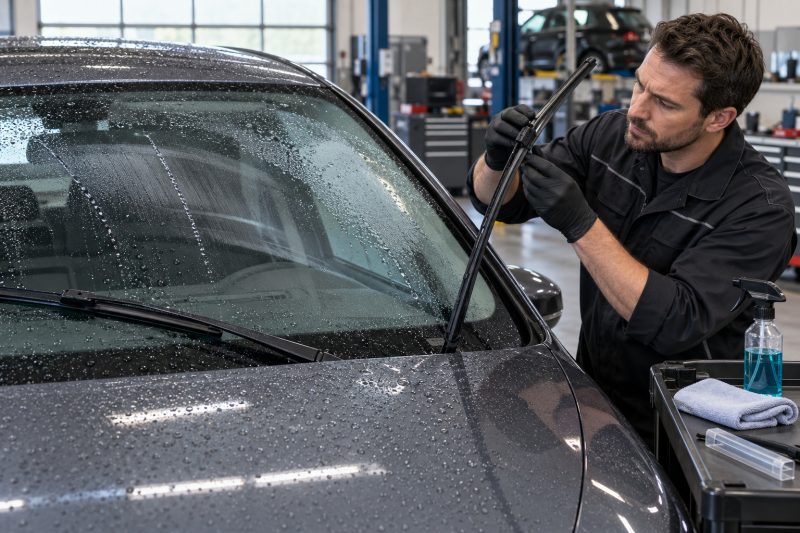
Why Brand-New Wiper Blades Can Still Leave Streaks
A new wiper blade should not need several weeks to “break in.” Its wiping edge should remove water effectively from the first proper wet test. If the blade streaks immediately, the result deserves inspection rather than a long waiting period.
The problem may come from one or more parts of the complete wiping system:
| Possible source | How it causes streaking | Typical symptom |
|---|---|---|
| Windshield contamination | Oil, wax or road film prevents clean squeegee action | Cloudy smearing that changes position |
| Dirty blade edge | Contamination transfers from the glass to the new rubber | Fine lines or repeated smears |
| Damaged rubber | A nick or uneven edge leaves water behind | Fixed narrow line |
| Incorrect blade size | Blade pressure and sweep geometry do not match the vehicle | Edge gaps or large missed areas |
| Wrong adapter | Blade sits too high, loose or at the wrong angle | Chatter, twisting or unstable wiping |
| Incorrect installation | Blade is reversed, unlocked or fitted to the wrong side | Noise, poor contact or interference |
| Wiper-arm problem | Weak pressure or a bent arm prevents even contact | Persistent missed section |
| Damaged windshield | Chips, scratches or rough deposits disturb the rubber edge | Streak remaining in one glass location |
A new blade can become contaminated during its first few cycles if the windshield still carries road film, car-wash wax, oily cleaning residue, tree sap or a deteriorating water-repellent coating. The new rubber then spreads that material rather than removing the water cleanly.
Fitment is equally important. Two blades with the same nominal length can have different curvatures, spring-rail designs or connector heights. A blade may physically attach to the arm but still fail to maintain even pressure across the windshield.
This is why wiper performance should be evaluated as a system involving:
- The windshield surface
- Washer fluid and spray coverage
- Blade length and construction
- Rubber-edge condition
- Connector and adapter
- Wiper-arm angle
- Arm spring pressure
- Installation orientation
If one part is incorrect, even a high-quality new blade may leave an unacceptable wipe.
The Installation and Cleaning Mistakes Drivers Often Miss
Before returning a new blade, check the simple problems that commonly occur during replacement.
Leaving a Protective Cover on the Rubber
Some wiper blades are shipped with a plastic sleeve, rail protector or colored strip over the wiping edge. This packaging component must be removed before operation.
A covered blade may slide across the windshield without clearing water correctly. It can also produce noise, skipping or broad smears.
Inspect the entire rubber element and remove only the clearly identified transport protection. Do not remove structural clips or components that are part of the blade.
Installing Unequal Blades on the Wrong Sides
Many vehicles use a longer driver-side blade and a shorter passenger-side blade. The two products may also have different curvatures or spoilers.
If they are reversed, the blades may:
- Contact each other during operation
- Move outside the intended glass area
- Leave large sections uncleared
- Apply pressure incorrectly
- Fail to return to the proper parked position
Verify the driver and passenger positions through a vehicle application guide instead of relying only on visual similarity.
Failing to Lock the Adapter Completely
A connector can appear attached even when its locking tab has not fully engaged. The blade may then move, rotate or change angle during operation.
After installation:
- Confirm that the adapter is the correct type.
- Push or slide the blade until the locking feature engages.
- Close any required adapter cover.
- Apply a gentle pull to confirm retention.
- Check that the blade sits in the correct direction.
Never force an adapter that does not move into position as described. The TOPEX wiper blade connector types guide explains why connector family, dimensions and locking design must all match.
Testing on Dry or Dirty Glass
Dry testing creates high friction and does not represent normal wiping conditions. Dust and grit can also damage the new wiping edge before the blade has been properly evaluated.
Use washer fluid or wet the windshield before operating the blades. Confirm that the washer nozzles distribute enough fluid across the intended area. A blocked or misdirected nozzle can leave part of the glass dry, making a good blade appear defective.
Installing a Directional Blade Backwards
Some blades use an asymmetrical spoiler or directional aerodynamic design. If installed backwards, airflow can reduce rather than improve windshield contact at road speed.
Compare the new blade’s orientation with its instructions and the original blade. Pay particular attention to products with an offset connector or prominent spoiler.
Cleaning Only the Blade
Wiping the rubber while leaving wax, oil or road film on the windshield provides only temporary improvement. The glass may immediately contaminate the blade again.
Clean both surfaces:
- Wash the windshield with water and an automotive glass cleaner.
- Remove insects, tree sap and stubborn road film appropriately.
- Rinse away cleaning-product residue.
- Wipe the rubber edge with a clean, damp cloth.
- Use a fresh section of the cloth until it no longer collects dark residue.
- Retest with washer fluid.
Avoid petroleum products, abrasive pads, oily dressings and silicone sprays on the wiping edge. They may damage the rubber or increase smearing.
What the Streak Pattern Reveals About the Cause
The appearance and location of the streak often provide more useful information than the age of the blade.
Fixed Narrow Lines
A fine line that remains in exactly the same position during every sweep commonly indicates:
- A grain of sand or other debris on the rubber
- A small nick in the wiping edge
- A manufacturing imperfection
- Hardened adhesive or packaging contamination
- Damage caused during installation
- A scratch or raised deposit on the windshield
Lift the blade and inspect the rubber under good lighting. Run a clean damp cloth gently along the edge and look for cuts, uneven areas or embedded particles.
If the rubber is visibly damaged, cleaning will not restore a continuous wiping edge. The blade should be replaced.
Moving Cloudy Film
A cloudy film that changes shape or location usually points toward contamination rather than a single cut in the rubber.
Possible sources include:
- Car-wash wax
- Road film
- Oily exhaust deposits
- Silicone residue
- Tree sap
- Insect residue
- Incorrect glass cleaner
- Deteriorating water-repellent treatment
- Washer-fluid contamination
The blade may appear to clear the glass in one direction and smear it again on the return stroke. Thorough glass cleaning is the appropriate first response.
Wide Missed Areas
A broad wet band or an area that remains almost untouched suggests a contact or fitment problem.
Potential causes include:
- Incorrect blade length
- Unsuitable blade curvature
- Bent supporting structure
- Weak wiper-arm pressure
- Twisted wiper arm
- Incorrect adapter height
- Blade installed in the wrong position
- Ice or debris blocking the blade structure
A large missed area near one end often means that the blade is not conforming to the windshield. Replacing the rubber alone may not correct this.
Chatter or Repeated Skipping
Chatter occurs when the rubber fails to reverse direction smoothly. The blade grips and releases the glass repeatedly instead of moving in a controlled sweep.
Common causes include:
- Dry operation
- Glass contamination
- Incorrect blade angle
- Directional blade installed backwards
- Hardened or damaged rubber
- Bent wiper arm
- Poor pressure distribution
Chatter accompanied by streaking should be diagnosed on a clean, wet windshield. The TOPEX guide to common wiper blade problems and solutions provides additional guidance for distinguishing wiping symptoms.
Streaks in One Glass Location
If different blades leave a mark in the same physical location, inspect the windshield itself. A scratch, chip, rough mineral deposit or damaged coating may disturb the wiping edge each time it passes.
| Streak pattern | Most likely category | First check |
|---|---|---|
| One fixed thin line | Debris or damaged rubber edge | Clean and inspect the edge |
| Moving cloudy smear | Glass or rubber contamination | Degrease and rinse the glass |
| Wide missed band | Fitment, curvature or arm pressure | Check size, contact and arm |
| Streak near blade end | Poor end pressure or unsuitable curvature | Confirm vehicle application |
| Chatter with diagonal marks | Contamination or incorrect blade angle | Wet test and inspect the arm |
| Same mark with multiple blades | Windshield defect or deposit | Inspect the glass closely |
| Poor wiping only at speed | Wind lift or unsuitable spoiler design | Confirm blade orientation and type |
Blade Defect or Vehicle Problem: How to Tell the Difference
A systematic test can help determine whether the blade itself is defective or whether the vehicle is preventing correct performance.
Clean-Test the Glass and Blade
Start with the least expensive and most common cause. Clean the windshield thoroughly and wipe the rubber edge with a clean damp cloth.
Test the blades with washer fluid. If the problem disappears, contamination was probably the main cause.
If the same fixed line remains, inspect the corresponding point on the rubber and windshield.
Observe the Blade While It Moves
From a safe position with the vehicle stationary, observe several wet wiping cycles. The blade should remain stable and maintain contact throughout the sweep.
Look for:
- One end lifting from the glass
- The adapter moving inside the arm
- The blade twisting excessively
- A section of rubber failing to reverse
- Contact with trim or the other blade
- Uneven movement caused by a bent frame
- A large area receiving insufficient washer fluid
Stop the wipers before touching any component.
Check Fitment Again
Do not assume that a blade is correct because it can be attached. Verify:
- Vehicle year
- Make and model
- Body version
- Driver or passenger position
- Required length
- Arm type
- Connector dimensions
- Adapter number
- Blade orientation
Accurate fitment depends on more than length. The TOPEX article on adapter coverage and fitment accuracy explains how connector security, blade angle, windshield contact and vehicle position work together.
Inspect the Wiper Arm
A wiper arm can cause repeated problems with several different blades. Inspect it for visible twisting, corrosion, looseness or damage.
Possible arm-related symptoms include:
- A wide missed area that remains after blade replacement
- One blade performing much worse than the other
- Persistent chatter on clean, wet glass
- Uneven contact pressure
- Blade leaning instead of sitting squarely on the glass
- Adapter movement despite correct installation
Arm spring pressure is difficult to judge accurately by hand. Excessive pressure can increase friction, while insufficient pressure allows water to remain beneath the blade.
Do not bend the arm casually. An incorrect adjustment may damage the arm, windshield or wiper mechanism. If the alignment or spring pressure appears abnormal, professional inspection is safer.
Use a Controlled Comparison
Where appropriate, compare the suspect blade with another verified product of the correct size and connector. This test should be performed only when the products are genuinely interchangeable for that position.
| Test result | Likely conclusion |
|---|---|
| Streak moves with the blade | Blade edge or blade structure may be defective |
| Streak remains in the same glass location | Windshield contamination or damage is more likely |
| Different correct blades miss the same broad area | Wiper arm or windshield geometry may be responsible |
| Reinstallation corrects the problem | Adapter engagement or orientation was incorrect |
| Cleaning corrects the problem temporarily | Contamination source remains on the glass or in the washer system |
| One new blade consistently fails on clean glass | Replacement or warranty evaluation is reasonable |
A blade should be considered potentially defective when its application and installation are correct, the windshield is clean and undamaged, the arm operates normally, and the same performance defect follows the blade.
A Step-by-Step Fix for Streaking New Wiper Blades
Use the following sequence to avoid replacing parts unnecessarily.
Step 1: Inspect for Shipping Protection
Check the rubber element for a plastic cover, colored protector or packaging strip. Remove it according to the product instructions.
Also inspect the blade for shipping damage, a bent structure or a rubber edge trapped outside its correct channel.
Step 2: Clean the Windshield Thoroughly
Wash the glass to remove loose dirt, then use an appropriate automotive glass cleaner to address road film and residue.
Pay attention to the complete blade path, especially:
- The bottom of the windshield
- Areas around washer-fluid deposits
- Sections affected by insects or tree sap
- Edges of old water-repellent coatings
- Places where the vehicle has recently received wax treatment
Rinse or wipe away cleaner residue before testing.
Step 3: Clean the Rubber Edge
Raise the arm carefully and support it. Wipe the rubber with a clean cloth dampened with water, washer fluid or a cleaner approved for the blade material.
Do not scrub aggressively. A new precision edge can be damaged by abrasive treatment.
Step 4: Confirm Size and Position
Use a trusted vehicle application catalogue to verify the driver and passenger blades separately. If the blades use unequal lengths, confirm that they have not been reversed.
Compare the product number and position with the packaging.
Step 5: Recheck the Connector
Remove and reinstall the blade if the adapter appears loose or incorrectly positioned. Follow the product-specific instructions and confirm that the lock engages fully.
Give the installed blade a gentle pull before lowering the arm.
Step 6: Confirm Blade Direction
Check that the spoiler, adapter and wiping edge face the intended direction. If the product has an offset connection, compare it with the original installation.
Step 7: Check Washer Operation
Operate the washer system and observe the spray pattern. Fluid should reach enough of the windshield to support a lubricated wipe.
Correct blocked, weak or misdirected washer jets before judging the blade.
Step 8: Complete a Wet Operational Test
Run the wipers for several cycles on a wet windshield. Observe the complete upward and return strokes at normal speed.
Do not rely on one quick cycle. Some contamination may need to be cleared from the blade after the glass has been cleaned.
Step 9: Inspect the Arm and Glass
If streaking remains, inspect the windshield for damage and the arm for incorrect angle, weak pressure or deformation.
Professional inspection is appropriate when the arm appears bent, loose or unable to maintain contact.
Step 10: Request a Replacement When Justified
Return or replace the blade when:
- The wiping edge has a visible nick or split
- The blade structure is warped
- The connector is defective
- The rubber is uneven or incorrectly assembled
- The blade repeatedly fails on clean glass
- Correct fitment and normal arm operation have been confirmed
When making a warranty claim, record the vehicle, blade position, product number, purchase date and streak pattern. Photographs or a short wet-test video can help the retailer or manufacturer identify the failure.
Conclusion
New wiper blades should provide a clear wipe without requiring a lengthy break-in period. If they leave streaks immediately, start by removing any protective cover and thoroughly cleaning both the windshield and rubber edges. Next, confirm that each blade is installed in the correct position, orientation and adapter, and that it follows the windshield evenly throughout its sweep.
A fixed line may indicate debris or a damaged wiping edge, while a cloudy moving film usually points to contamination. A broad missed area more often suggests incorrect fitment, unsuitable curvature or insufficient arm pressure. If a correctly installed blade still streaks on clean, undamaged glass, inspect the wiper arm and consider returning the blade as defective.
Frequently Asked Questions
Do new wiper blades need time to break in?
No extended break-in period should be necessary. A properly manufactured, correctly installed blade should wipe effectively during its first wet test. Immediate streaking should prompt inspection of the glass, rubber edge, adapter and fitment.
Why do new wipers leave a cloudy film on the windshield?
A moving cloudy film usually indicates contamination such as road grime, car-wash wax, oily cleaner residue, tree sap or a deteriorating water-repellent coating. Clean the windshield and rubber edges before retesting.
Should I clean the windshield before installing new blades?
Yes. Cleaning prevents old contamination from transferring directly onto the new rubber. It also gives you a reliable surface for evaluating the blade’s actual performance.
Can incorrect wiper size cause streaking?
Yes. Incorrect length or curvature can create uneven pressure, edge lift, interference or broad missed areas. Always verify the driver and passenger positions separately through a vehicle-specific application catalogue.
How can I tell whether the blade or wiper arm is faulty?
If the defect moves with the blade, the blade may be responsible. If several verified blades miss the same area, inspect the arm pressure, alignment and windshield. A broad persistent gap often indicates a contact problem rather than a small rubber defect.
Should I return new wiper blades if they still streak after cleaning?
Return or exchange them if the glass is clean, the fitment and installation are correct, the arm operates normally and the blade still leaves a repeatable streak or missed area. Visible rubber damage, structural distortion or a defective connector also justifies replacement.

--- END ---


