
Rear Wiper Blade Replacement: How to Find the Right Size and Fit
Oct 29, 2026
Rear wiper blades are easy to overlook until rain, road spray, dust or snow makes the rear window difficult to see through. On SUVs, hatchbacks, crossovers, estates and MPVs, a working rear wiper can be particularly useful when reversing, changing lanes or monitoring traffic through the interior mirror.
However, buying a replacement is not always as simple as measuring the old blade. Rear wipers often use compact housings, dedicated connectors and vehicle-specific mounting angles. Two blades with the same nominal length may therefore be completely incompatible.
I am Jacky Huang, CEO of Xiamen TOPEX Auto Parts Co., Ltd. From our experience developing and supplying wiper blades for different vehicle applications, rear-wiper selection should be based on three separate requirements: the correct vehicle application, the correct blade length and the correct connector.
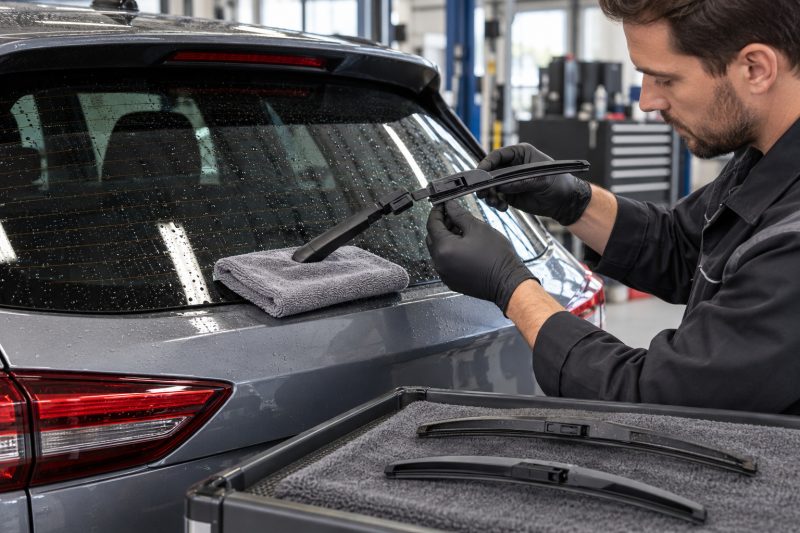
Why Rear Wiper Blades Are Easier to Mismatch Than Front Blades
Front wiper systems are generally more visible and receive more attention from drivers, retailers and fitment databases. Rear wiper systems can be more difficult because they are often designed around the shape of the tailgate, rear glass, spoiler and parked wiper position.
A rear blade may include:
- A compact moulded housing
- An integrated vehicle-specific connector
- A curved plastic or metal supporting structure
- A dedicated locking tab or mounting pin
- A low-profile design that fits beneath a spoiler
- A parked position close to the edge of the tailgate
- A wiping angle designed for strongly curved rear glass
These features mean that a replacement blade must do more than match the old blade’s length.
| Fitment factor | Why it matters | Possible result if incorrect |
|---|---|---|
| Blade length | Determines the intended wiping area | Reduced coverage or contact with trim |
| Connector type | Attaches the blade to the rear arm | Blade cannot be installed or locked |
| Housing profile | Controls clearance beneath trim or spoilers | Interference during the sweep |
| Blade curvature | Helps the rubber follow the rear glass | Missed areas or uneven wiping |
| Mounting angle | Positions the rubber correctly on the glass | Chatter, twisting or poor contact |
| Vehicle position | Separates rear applications from front applications | Incorrect product selection |
A blade that is too long may strike the tailgate trim, spoiler, glass edge or bodywork. A blade that is too short may operate without interference, but it will clear less glass than the vehicle manufacturer intended.
Incorrect connector geometry creates another risk. A blade may appear to attach to the arm but fail to lock completely. Movement between the connector and arm can cause noise, unstable wiping or detachment during operation.
Rear glass curvature also matters. Because many rear windows are compact and strongly curved, a blade with unsuitable pressure distribution may contact the center of the glass while leaving one or both ends uncleared.
For these reasons, the first question should not be, “What is the shortest blade available?” It should be, “Which rear blade is verified for this vehicle, model year, body style and market?”
The Rear Wiper Replacement Mistakes Drivers Commonly Make
The most common purchasing mistake is measuring the old blade and ordering any product with the same nominal length. Measurement is useful, but it is only one part of fitment verification.
Selecting by Length Alone
A 12-inch rear blade from one vehicle may use a completely different connector from another 12-inch blade. The housing height, mounting direction and curvature can also differ.
Length should therefore be treated as a confirmation field, not the complete product description.
Using a Short Front Blade on the Rear Window
Some front wiper ranges include short sizes that appear suitable for rear-window use. Nevertheless, front and rear systems frequently differ in several important ways:
- Front blades may use taller multi-fit adapters.
- Rear blades may have integrated plastic connectors.
- Front blade spoilers may face the wrong direction.
- The adapter may interfere with the tailgate or spoiler.
- The front blade’s curvature may not match the rear glass.
- The fitted blade may sit too far away from the arm.
A front blade can be used only when the manufacturer explicitly lists it for that rear application. Similar length is not sufficient evidence. Rear wipers are recognized as specialty products because vehicles can have unique rear-glass and installation requirements.
Ignoring the Body Style
The same model name may be sold as a hatchback, saloon, estate or crossover. One body version may have a rear wiper while another does not. Even when two versions have rear wipers, their tailgates, glass shapes and arm systems may differ.
An accurate lookup may therefore require:
- Model year
- Vehicle make
- Model
- Generation
- Body style
- Sales region
- Rear installation position
Reusing Front-Wiper Information
The driver-side, passenger-side and rear blades must be treated as separate positions. A catalogue showing the front pair does not automatically confirm the rear product.
Rear blades often use dedicated arms and attachments, so the correct front blade family may offer no information about rear fitment.
Assuming “Universal” Means Every Vehicle
A universal or multi-fit rear blade covers a defined group of arm connections through adapters. It does not fit every rear-wiper arm.
The package or application catalogue should identify the required vehicle, rear position and adapter. If the exact connector variation is not documented, the product should not be forced onto the arm.
Forcing an Unfamiliar Connector
A replacement that needs excessive force is usually misaligned, incorrectly oriented or equipped with the wrong adapter. Forcing it can break a locking tab, damage the arm or leave the blade insecure.
Stop and compare the new connector with the original before applying more pressure.
How to Find the Correct Rear Wiper Size and Connector
The most reliable method is to begin with a vehicle-specific application catalogue. Enter the complete vehicle information and select a product explicitly listed for the rear position.
A practical verification sequence is shown below.
| Verification step | Information to collect | Recommended evidence |
|---|---|---|
| Identify the vehicle | Year, make, model and body version | Registration, VIN or owner’s manual |
| Confirm the market | Country or regional specification | Regional fitment catalogue |
| Identify the position | Rear window | Product listing marked “rear” |
| Check the length | Blade measured end to end | Catalogue plus physical measurement |
| Inspect the connector | Locking tab, pin, slot and mounting direction | Photograph of the original blade |
| Check reference numbers | OE or supplier application number | Catalogue or original part data |
| Confirm clearance | Spoiler, trim and glass boundaries | Physical inspection and wet test |
The WiperPro rear-wiper guide similarly recommends choosing only a blade or kit that specifically identifies the rear position for the relevant vehicle variant.
Use Year–Make–Model Data First
Search by the complete vehicle identity rather than entering only the model name. Manufacturers can change the rear arm, connector or blade during a generation update. Regional versions may also differ.
If the vehicle is near a generation-change year, check the VIN, production date or physical connector before ordering.
Measure the Blade Correctly
If reliable catalogue information is unavailable, measure the existing blade itself from end to end. Do not measure from the wiper-arm pivot or include the length of the arm.
Rear blades are commonly sold in inch-based sizes, but the actual product may be designed in millimetres. Small differences in published conversion values are therefore possible.
For example:
| Nominal inch size | Approximate metric equivalent |
|---|---|
| 8 inches | 200 mm |
| 9 inches | 230 mm |
| 10 inches | 250 mm |
| 11 inches | 280 mm |
| 12 inches | 300 mm |
| 13 inches | 330 mm |
| 14 inches | 350 mm |
| 15 inches | 380 mm |
| 16 inches | 400 mm |
The measurement should confirm catalogue data rather than replace it. Do not automatically choose a longer blade merely because additional space appears available.
Photograph the Original Connector
Before removing the old blade, take clear photographs of:
- The complete blade and arm
- The central mounting point
- The locking tab or release button
- The connector from both sides
- The blade’s installed orientation
- Any OE number moulded into the housing
These photographs are helpful when comparing products online or requesting assistance from a supplier.
For a broader explanation of arm and adapter designs, see the TOPEX wiper blade connector types and fitment guide.
Check the OE Reference Where Available
An OE reference number can help distinguish between products that look similar. However, it should be used with the vehicle application rather than as the only decision point, because references can be superseded or applied differently across markets.
When several catalogues disagree, prioritize:
- The vehicle manufacturer’s information
- VIN-specific parts data
- A reliable regional application catalogue
- The original blade and connector
- Physical sample verification
Exact-Fit vs. Multi-Fit Rear Wipers: Which Should You Choose?
Exact-fit and multi-fit rear blades can both provide satisfactory performance, but they solve different purchasing and inventory problems.
OE Exact-Fit Rear Blades
An OE exact-fit blade is designed for a specific group of vehicle applications. Its connector may be integrated into the housing, allowing the blade to attach directly to the intended arm.
“OE exact-fit” describes fitment and design compatibility. It does not necessarily mean that the blade is a genuine part supplied by the vehicle manufacturer.
Typical advantages include:
- Fewer adapter-selection decisions
- An appearance closer to the original blade
- A low-profile installation
- More direct fitting instructions
- Reduced risk of interference around the tailgate
- Clearer vehicle-specific positioning
The main limitation is inventory complexity. Retailers and distributors may need more individual SKUs to cover multiple rear-wiper systems.
Multi-Fit Rear Blades
A multi-fit blade uses a shared blade platform with several adapters or mounting options. This can reduce SKU requirements and help distributors cover more vehicles from a smaller inventory.
TOPEX offers a multifunctional rear wiper blade range designed around different rear-window applications and adapter requirements.
The benefits of multi-fit products include:
- Broader coverage from fewer blade platforms
- Simpler inventory planning
- Easier mixed-vehicle stocking
- Potentially better availability for uncommon applications
However, multi-fit products depend heavily on accurate application data and clear instructions. The correct adapter must lock securely, maintain the required blade angle and avoid interference with the tailgate structure.
| Buying priority | Exact-fit rear blade | Multi-fit rear blade |
|---|---|---|
| Direct installation | Usually stronger | Depends on adapter selection |
| Original appearance | Usually closer | May have a more generic profile |
| SKU efficiency | Lower | Higher |
| Vehicle-data requirement | Precise application required | Precise application and adapter required |
| Installer decisions | Fewer | More |
| Best use | Popular vehicle-specific applications | Verified coverage across several arm types |
The better option is the one that has been verified for the vehicle. A poorly matched exact-fit listing can still create a return, while a well-designed multi-fit blade can perform correctly when its adapter and application have been properly validated.
Distributors should evaluate rear blades using the same principles explained in the TOPEX guide to OE exact-fit and universal wiper blades: application accuracy, connector security and actual wiping performance matter more than the label alone.
How to Replace and Test a Rear Wiper Blade Safely
Rear-wiper replacement is usually straightforward, but the exact removal method varies by connector. Consult the vehicle manual or blade instructions before starting.
1. Park the Vehicle Safely
Switch off the vehicle and make sure the rear wiper is in its normal parked position. Some vehicles require the wiper to be placed in a service position before the blade or arm can be lifted.
Do not force an arm trapped beneath a spoiler.
2. Protect the Rear Glass
Place a folded towel on the glass beneath the arm. Once the blade is removed, the spring-loaded arm can fall and strike the window.
Rear glass is often tempered and should not be exposed to a hard impact from the bare arm.
3. Inspect the Existing Installation
Before removing anything, note:
- Which direction the blade faces
- How far the arm can safely lift
- Where the release tab is located
- Whether the blade rotates before removal
- How the connector sits inside the arm
- Whether a cover must be opened first
Taking a photograph at this stage can prevent installation in the wrong orientation.
4. Remove the Old Blade
Lift the arm only as far as the design allows. Press the release tab, rotate the blade or slide it in the direction specified by the instructions.
If the blade does not release easily, check for another locking tab or cover. Avoid using excessive force or metal tools against the glass.
5. Compare Old and New Products
Before installation, place both blades side by side and compare:
- Overall length
- Connector shape
- Mounting direction
- Housing height
- Rubber-edge position
- Blade curvature
- Adapter number
A significant difference should be investigated before the new blade is fitted.
6. Install and Confirm the Lock
Align the connector and move the blade into position until the locking feature engages. Depending on the design, you may hear a click or feel the tab settle into place.
Then apply a gentle pull. The blade should remain attached without looseness or unexpected movement.
7. Lower the Arm Carefully
Support the arm while returning it to the glass. Never allow it to snap down.
Check that the rubber sits naturally against the window and that the housing does not contact the spoiler, trim or tailgate.
8. Complete a Wet Operational Test
Do not test a new blade repeatedly on dry glass. Apply washer fluid or wet the rear window before operating the wiper.
Observe several complete cycles and confirm that the blade:
- Remains securely attached
- Clears the intended viewing area
- Follows the glass curvature
- Does not strike trim or bodywork
- Returns to the correct parked position
- Produces no repeated skipping or chatter
- Leaves no consistent missed sections
If the blade skips or leaves an uncleared area, stop and inspect the connector, orientation, glass cleanliness and arm condition.
| Symptom after installation | Possible cause | First action |
|---|---|---|
| Blade will not attach | Incorrect connector or adapter | Recheck the application listing |
| Blade feels loose | Locking tab not fully engaged | Remove and reinstall correctly |
| One end misses the glass | Incorrect curvature or weak arm pressure | Confirm blade application and inspect arm |
| Blade strikes trim | Blade too long or mounted incorrectly | Stop use and verify size |
| Blade chatters | Dirty glass, wrong angle or dry operation | Clean and complete a wet test |
| Blade twists during the sweep | Incorrect adapter orientation | Recheck installation instructions |
| Persistent streaking | Contamination or damaged wiping edge | Clean the glass and inspect the rubber |
Conclusion
Replacing a rear wiper blade begins with identifying the correct vehicle application—not simply buying a short blade with a similar length. Confirm the model year, body style, rear-blade length and connector before ordering. An exact-fit replacement generally provides the simplest installation, while a multi-fit blade can also work when the correct adapter and application are clearly documented.
During installation, avoid forcing the connector or allowing the bare arm to strike the glass. After fitting the blade, test it with washer fluid and make sure it locks securely, follows the rear-window curvature and completes its sweep without interference, skipping or missed areas.
Frequently Asked Questions
How do I find the correct rear wiper blade size for my vehicle?
Enter the exact year, make, model, body style and market into a reliable fitment catalogue. Select a product explicitly listed for the rear position. Confirm the result by measuring the existing blade and comparing the connector.
Are rear wiper blades universal?
No. Some multi-fit rear blades cover several arm types, but they are not compatible with every vehicle. Rear blades can use integrated connectors, unusual mounting angles and vehicle-specific housings.
Can I use a front wiper blade on the rear window?
Only when the blade manufacturer explicitly lists that product for the rear application. A short front blade may have the wrong adapter, profile, curvature or mounting height even when its nominal length matches.
How do I identify my rear wiper connector type?
Inspect the attachment between the blade and arm. Photograph the locking tab, pin, slot and mounting direction, then compare them with the supplier’s connector illustrations. Vehicle-specific application data is more reliable than appearance alone.
Can I install a rear wiper blade that is one inch longer?
It is not recommended unless the longer size has been tested and approved for the vehicle. It may hit the spoiler, trim or glass boundary, fail to park correctly or place additional load on the wiper mechanism.
Why does my new rear wiper blade skip or leave missed areas?
Possible causes include an incorrect blade application, reversed installation, an incompletely locked adapter, unsuitable curvature, weak or twisted arm pressure, dirty glass or dry operation. Verify the fitment and installation before concluding that the rubber is defective.

--- END ---


